Research Summary Report of A06
Laser Powder-Bed Fusion (LPBF) of Steel Elements for Construction – Basics of Design and Mechanical Resilience
[22.09.2023]
Wenzler, David; doctoral researcher; david.wenzler@tum.de
Technical University of Munich, Institute for Machine Tools and Industrial Management
Diller, Johannes; doctoral researcher; johannes.diller@tum.de,
Siebert, Dorina; doctoral researcher; dorina.siebert@tum.de
Technical University of Munich, Chair of Metal Structures
Project
The project A06 aims to explore and evaluate the factors influencing the manufacturing of safe and durable structural steel elements by laser powder-bed fusion (LPBF). Thereby, the LPBF process, the post-treatment, and the influence of the part geometry on the microstructure and the mechanical properties will be investigated. From the results, correlations between these aspects will be determined. In the 1st funding period, the project focuses on analyzing small-scale specimens and complex facade elements with multi-axial stress states. Based on the results, a first methodology for a qualified design of safe and durable structural steel elements by means of additive manufacturing will be derived.
Current state of research
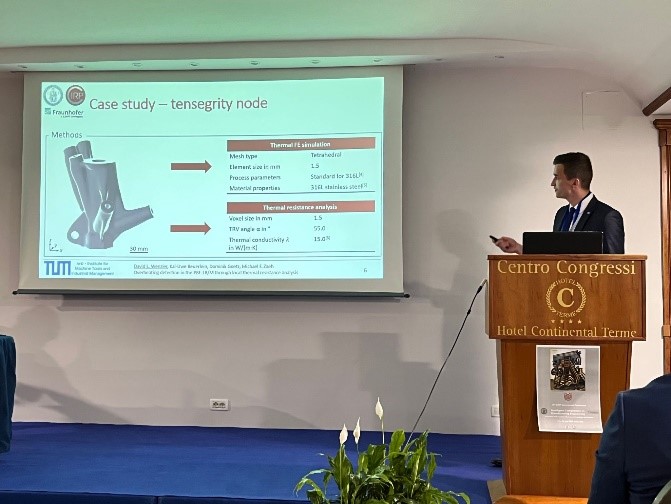
In project A06, an overheating detection for LPBF parts was implemented. The algorithm computes the local thermal resistance within a part relative to the build platform. With this analysis, counter-measures, such as placing support structures or adapting the process parameters, can be applied before a part is manufactured. The results were presented at the 17th CIRP Conference on Intelligent Computation in Manufacturing Engineering (CIRP ICME ’23) (see Fig. 1). The publication with the title “Overheating detection in the powder bed fusion of metals using a laser beam through local thermal resistance analysis” [1] will be published in the conference proceedings in the Procedia CIRP.
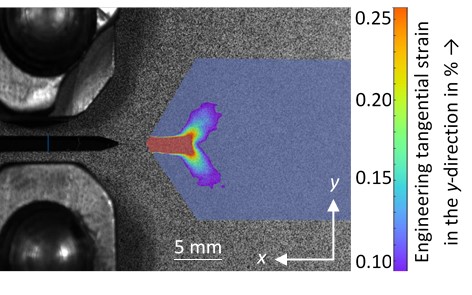
In another recent study, the fatigue crack propagation of 316L processed by LPBF was studied. The investigation focused on the influence of the build direction on the fatigue crack propagation. Notched specimens were manufactured with different build orientations. The specimens were subjected to a controlled fatigue loading, while images of the evolving crack tip were captured by a laser extensometer. These images were analyzed using the digital image correlation (DIC) technique to visualize the strain distribution near the propagating crack tip. Essential parameters, such as the threshold value of the stress intensity factor range △Kth and the Paris law constants C and m, were determined for the horizontal and vertical specimens. Fig. 2 shows the notch tip of a specimen during the tests. A plastic zone forms at the crack tip, indicated by the large tangential strain in the y-direction. The analysis of this zone provides information about the stress intensities at the crack tip.
The results highlighted the effectiveness of DIC as a tool for visualizing a strain distribution. The results of the fatigue crack propagation tests showed a relationship between the build direction and the fatigue crack growth behavior.

Fig 1: Presentation of the current research at the CIRP ICME ‘23

Fig. 2: Digital image correlation measurement of the plastic zone at the crack tip of a 316L specimen manufactured by LPBF


